Debugging VoiceXML applications using Composer

Do you know that you can debug voicexml applications using Genesys composer? Composer debugger is integrated with GVP to make test calls, trace calls and debug applications.
Setup your debug session
First you need to setup GVP debugger and then launch configuration. Please follow the steps below to setup GVP debugger
- Select Window > Preferences, then expand Composer and select Debugging.
- Specify the following settings
- Network Interface. Composer debugging uses this setting to make the socket connection for the Debugger control channel. If you have multiple NIC cards of multiple networks (such as Wireless and LAN) select the interface on which GVP will communicate to your desktop.
- Select GVP Debugger and specify:
- SIP Phone User Name. This is the user name or phone number of your SIP Phone.
- SIP Phone Hostname/IP. This is the IP address on which your SIP phone is running. Again, if you have multiple NIC cards or interfaces, make sure you specify the same IP address as corresponds to the Network Interface selected above.
- SIP Phone Port. This is the port on which your SIP phone is running.
- Platform IP. This is the IP address of your GVP Server.
- Platform Port. Resource Manager Port Number.
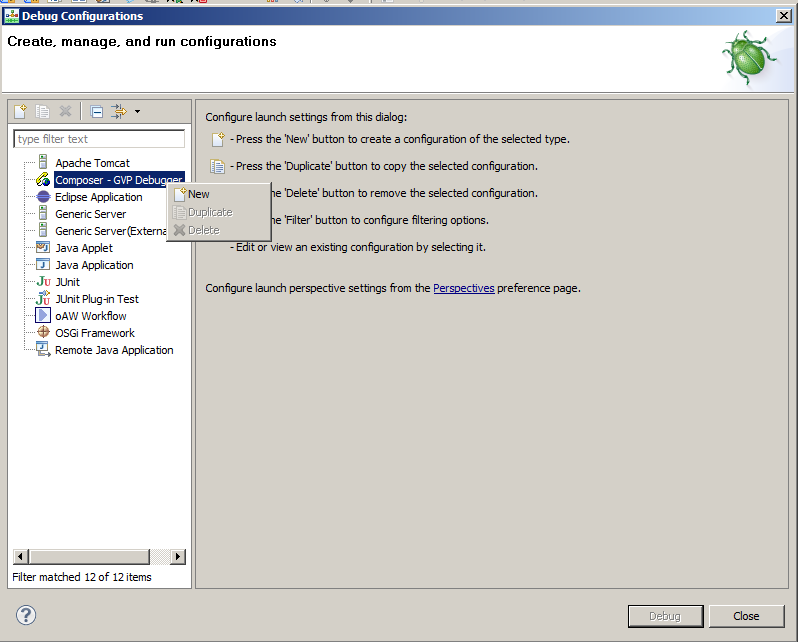
To create debug launch configuration, follow the steps below
In the Project Explorer, expand the Composer Project and its callflows subfolder.
- Right-click on the callflow filename in the Project Explorer and selectDebug as > Debug Configurations.
- Expand Composer – GVP Debugger.
- Select New Configuration. The Debug Configurations dialog box opens.
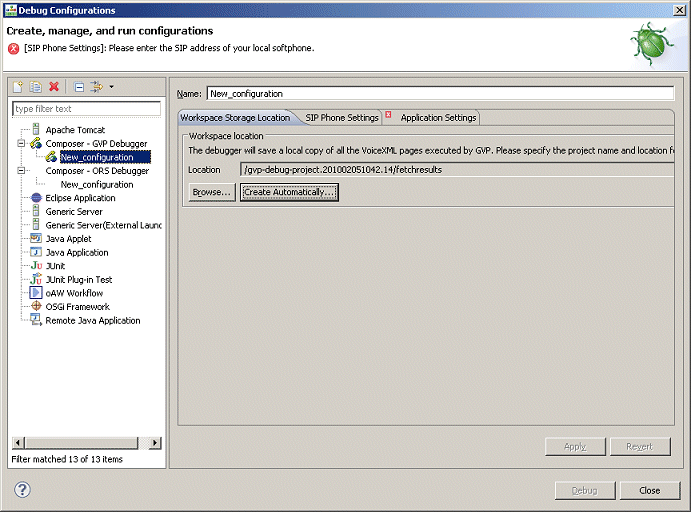
- Name the configuration.
- Click the Create Automatically button to create a new project folder to save the metric traces and VXML pages as the calls are being executed. This folder appears in the Location field. Please note that there is currently no automatic cleanup so the number of files can become large. Clean up the debugging results by deleting the gvp-debug.<timestamp> folders from the Project Explorer. Each gvp-debug.<timestamp> folder corresponds to a single debug call that was made at the time specified by the timestamp.
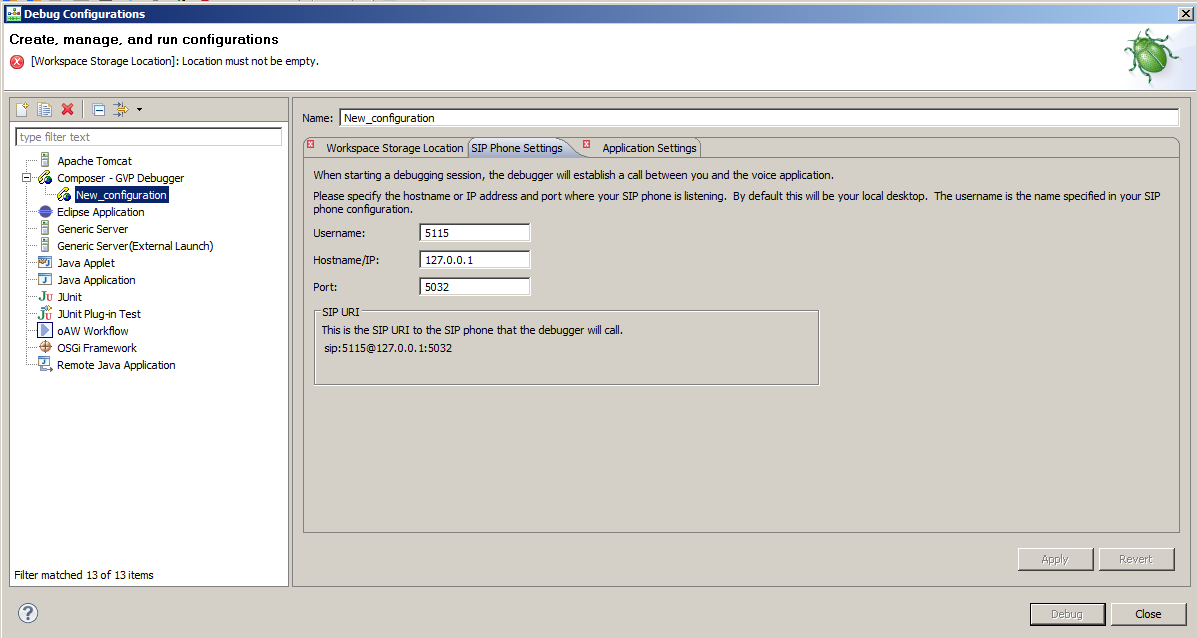
- Click the SIP Phone Settings tab and provide your SIP Phone information if not already there from GVP Debugger Preferences
- Click the Application Settings tab and select Callflow Diagram
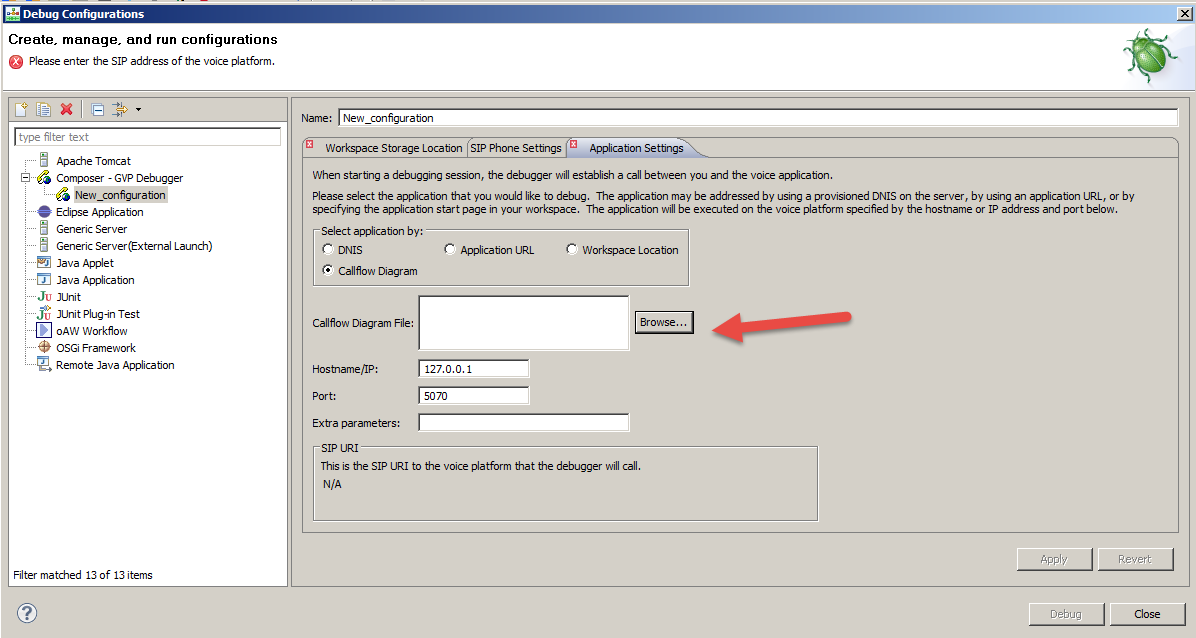
- Input variables in a callflow diagram can be initialized in a Debuggercall using the Extra Parameters field in the Debug Configurations >Application Settings tab. The Parameter names should match the “Input” variable defined in the Entry Block of the Callflow diagram.
- Click Apply.
- Click Debug. This will automatically dial out your SIP Phone.
- Accept the call and you will be connected to the application on GVP. Composer switches to the GVP Debugging perspective.
How do you start debugging your application?
Alternatively, once it is setup, you can start a debugging session in the following ways:
- Right-click on the diagram/VXML file and Select Debug As > Debug Callflow.
- On the main toolbar, there is a Debug button
 . Clicking this button launches the most recently used debug configuration. You can also use the keyboard shortcuts F11 (for Debug).
Once the call is initiated, you will see a red box around the block, which indicates where the call is currently paused.
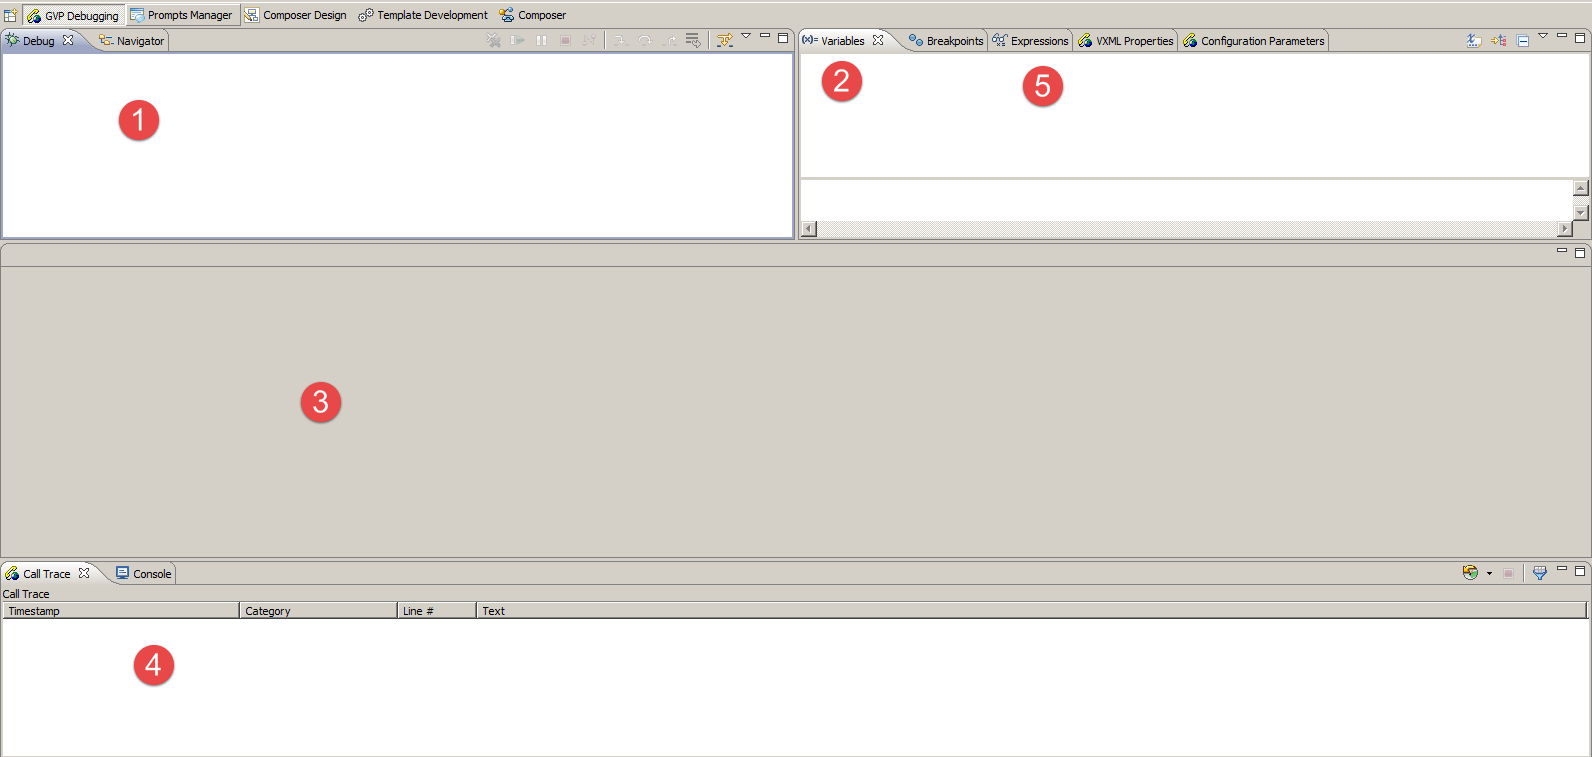
1 – Debug View. This view shows the name of the callflow or workflow diagram being debugged, as well as the status of the debug progress or result
2 – Variables. The Variables view displays information about the variables associated with the stack frame selected in the Debug view
3 – CallFlow. Call flow diagram will be display if you are debugging call flow. Active block will be surrounded by Red box
4 – Call Trace Window. Call traces will be visible at this window
5 – Expressions. Use the Expressions view to inspect data from a stack frame of a suspended thread, and other places
Click the step over button ![]() on ‘Debug’ view to single step through the blocks. When stepping t through call flow diagram call traces will become visible in the call trace window
on ‘Debug’ view to single step through the blocks. When stepping t through call flow diagram call traces will become visible in the call trace window
Also, you can watch and change variable values during debugging session. This will be useful if you want to test different scenarios.
To change value, expand the variable, right click and select ‘Change value’. Specify new value and click ‘Ok’ to proceed with your debug session.
Tips:
- In the application settings (Step 8), you can specify DNIS to verify GVP Profiles are configured correctly.
- Similarly, you can specify application URL path to verify that application is deployed correctly to the web server and URL is accessible